A Guide to Installing Wedge Anchors

In our blog post we cover top tips for installing wedge anchors. Although reasonably simple to install there are set practices which if not followed, could cause a catastrophic installation failure.
Wedge Anchors an Overview
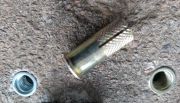
Wedge anchors are a type of expansion anchor that are commonly used to provide a secure fixing into concrete. They provide a permanently fixed threaded socket allowing bolts and threaded rods to be easily installed achieving consistent weight load values.
Wedge anchors are a testament to installers imaginations, as they are known by a myriad of other names on site, including but not limited to; Drop-in Anchors, Toothless Anchors, Non-drill Anchors, Knock-in Anchors, Hilti Shots, Bullets, Flush Anchors, Hammer Sets, Red Eyes and Red Heads…
They are relatively easy to install, but there are a few things you must do to ensure correct installation in order to achieve the specified weight loading and prevent installation failures.
How to Install Wedge Anchors Correctly – a Step by Step Guide
1. Choose the right wedge anchor
There are a variety of types, sizes and brands of wedge anchors available, so it’s important to choose the right one for your application, ie if installing into concrete that contains rebar, the embedment depth should be taken into account with a shorter length wedge anchor chosen (ie 25mm). There are also many brands of wedge anchor available, the main thing here is to chose a brand which provides the required technical data for correct installation such as Fischer or JCP, which we stock, or an alternative well-known brand.
There are three main types of wedge anchors to be aware of:
- Standard – for use in non-cracked concrete.
- Lipped - designed with a flange to help prevent penetrating too deep into the concrete.
- ETA Approved - for use in cracked concrete.
2. Position the wedge anchor appropriately
Wedge anchors are a friction anchor with a simple but effective mechanism, as when installed correctly they will expand, effectively forming a wedge between the anchors body and the concrete. This places ‘stress’ on the concrete so you must always follow the manufacturers recommended minimum spacing between anchors and edge distance to prevent installation failure.
3. Drill the correct sized hole
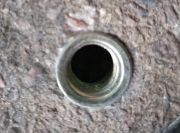
The hole that is drilled for a wedge anchor must be the correct depth and diameter. The depth of the hole should be equal to the embedment depth of the anchor. The diameter of the hole should be slightly larger than the diameter of the anchor's sleeve (ie a 10mm hole for a M8 wedge anchor). Both of these measurements should be specified in the wedge anchor's technical data for installation.
It’s important to use a stop-drill recommended by the manufacturer to give you the correct depth and diameter required for the wedge anchor. Ie select a branded stop drill to match your chosen wedge anchor.
4. Clean the hole
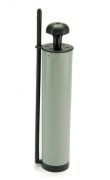
The hole that is drilled for a wedge anchor must be cleaned thoroughly before the anchor is inserted. As any dirt or debris in the hole can prevent the anchor from expanding properly. Use a blow-out pump or vacuum extraction drill-bit for this.
5. Insert the wedge anchor
Insert the wedge anchor into the hole by hand. Once the anchor is inserted, it should be tapped lightly with a hammer to ensure that it is seated properly and that it sits flush with the substrate.
6. Expand the wedge anchor
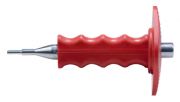
For manual setting it’s essential to use a correct weighted hammer, plus a setting tool recommended by the manufacturer, which is the correct size for the wedge anchor to be installed. ie use a Fischer M10x30 setting tool for a Fischer M10x30 Wedge anchor. This sounds simple but isn’t always followed on site, with makeshift tools used instead.
Manufacturers setting tools are often equipped with a witness mark which will be visible if the wedge anchor has been installed correctly. Anchor testers from brands such as Fischer and JCP will only test their installed anchors if the correct branded tools have been used, so if a witness mark is missing, they may refuse to do the test.
7. Apply the correct torque
Insert the bolt or threaded rod to be fixed into the wedge anchor and then tighten to the manufacturer’s recommended torque. Too much torque can damage the anchor, while too little torque will not secure the anchor properly. Use a calibrated torque wrench to ensure the correct torque is applied.
8. Wear PPE
Finally, an obvious one but as well as standard site PPE, always wear protective safety glasses and gloves when fixing into concrete.
Following the above steps, will help ensure that your wedge anchors are installed correctly, providing a secure fixing to the specified weight load.
Wedge Anchors Top Tip
Key take away - it’s best practice to use the correct branded stop drill and setting tool to match your selected brand and size of wedge anchor. This helps guarantee correct installation, preventing failures or refusals from manufactures to undertake an anchor test.
In addition to holding good stocks of wedge anchors, we can also arrange anchor tests for the fixings we supply (subject to terms and conditions). So, if you have any requirements for wedge anchors, contact our team for a quick quote or technical advice on 01322 274 226 or [email protected].


